How do I set up the plug-in from Newsletter2Go to Gambio?
Before you start: To use the plug-in, you will need a premium template with web shop integration. You can use the Premium Template to import product information and photos directly into your newsletter. You can find more information about newsletter tempaltes here.
1. Installing the plug-in
1.1 copy files
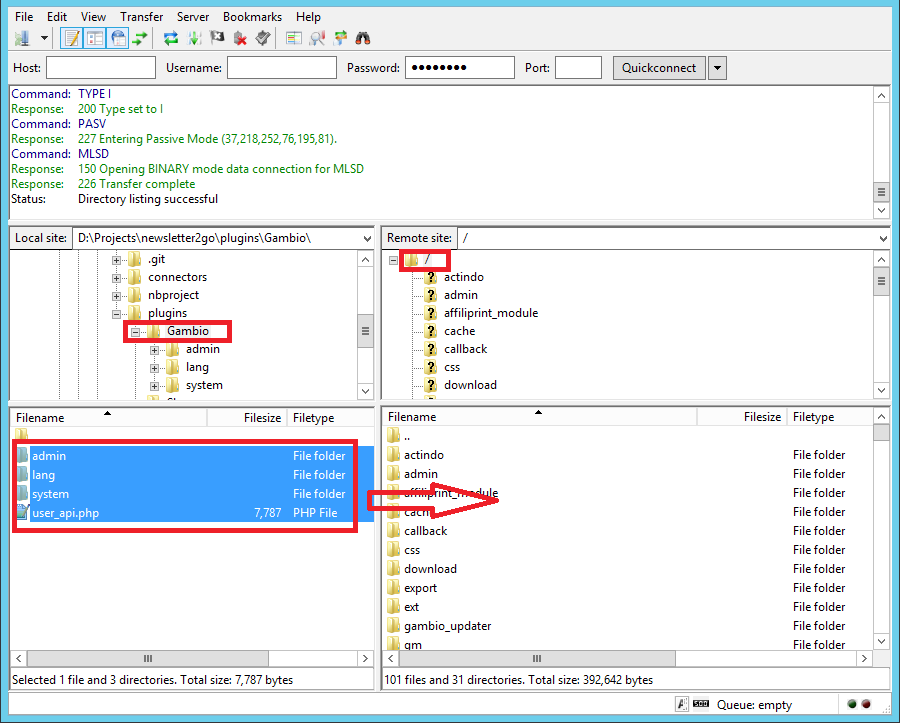
Before connecting to Gambio API with supplied connector, a plugin must be installed. Plugin is packed in Gambio folder. First you need to upload files from Gambio folder to your FTP server. To upload files to your FTP server, you will need an FTP client tool. Plenty of FTP programs can be found on the internet. FileZilla is used in the example below.
Once your FTP program is connected to your server, navigate to the extracted Gambio plugin in your local directory (left), and your shop folder on the FTP server (right). Select ALL files in your Gambio plugin local folder and drag them into your shop folder. Upload will start immediately. NOTE: If you have older than 2.0 version of Gambio please ignore system folder.
1.2 Modify base files
In order for the plugin to work in your Gambio system, a few lines of codes need to be added in your Gambio backend.
Copy marked code and paste them at the corresponding lines in your file. Line numbers in the following code snippets, however, refer to an “unmodified” version of files. If you already modified your files, the line numbers may vary. Only the highlighted parts need to be added into the files.
The paths are relative to your shop’s base folder. E.g. if your Gambio has been installed at /public_html/catalog/, then the path of includes/filenames.php refers to /public_html/catalog/includes/filename.php.
Also keep in mind that the default folder name admin is used below. If you have renamed your admin folder, please locate the files in that directory.
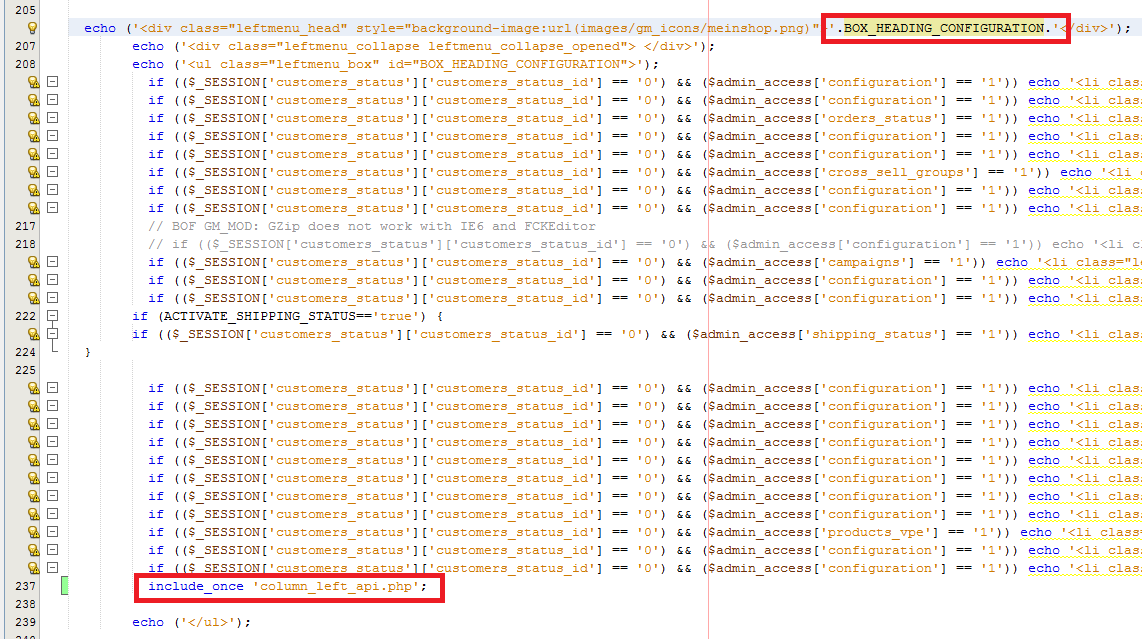
Step 1.
NOTE: This step is only for older versions of Gambio. If using Gambio GX2 version or newer, skip this step.
- Open the file admin/includes/column_left.php
- Copy the following code and paste it at the corresponding position in your file. Code must be under BOX_HEADING_CONFIGURATION segment.
include_once ‘column_left_api.php’;
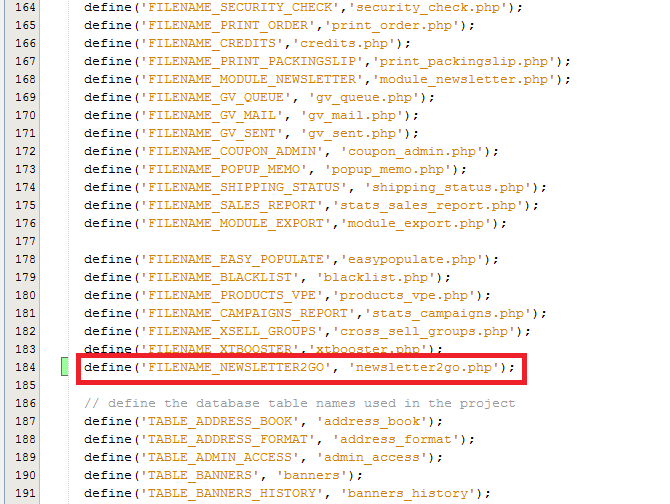
Step 2.
- Open the file admin/includes/application_top.php
- Copy the marked codes below, and paste them at the corresponding position in your file.
NOTE: Steps 3 -7 are for enabling plugin in different languages. Do only those steps for which your shop has available languages.
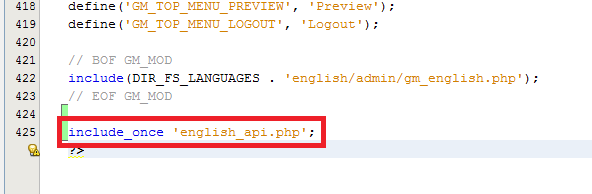
Step 3. English
- Open the file lang/english/admin/english.php
- Copy the marked codes below, and paste them at the corresponding position in your file. In this case it is at the end of your file.
Step 4. German
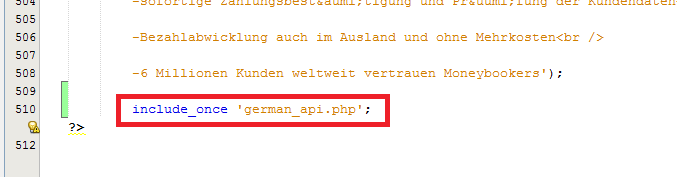
- Open the file lang/german/admin/german.php
- Copy the marked codes below, and paste them at the corresponding position in your file. In this case it is at the end of your file.
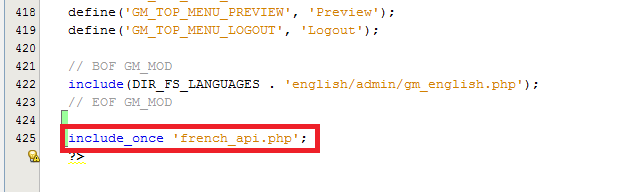
Step 5. French
- Open the file lang/french/admin/french.php
- Copy the marked codes below, and paste them at the corresponding position in your file. In this case it is at the end of your file.
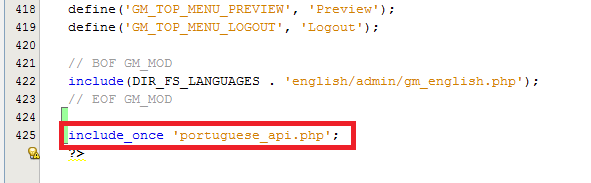
Step 6. Portuguese
- Open the file lang/portuguese/admin/ portuguese.php
- Copy the marked codes below, and paste them at the corresponding position in your file. In this case it is at the end of your file.
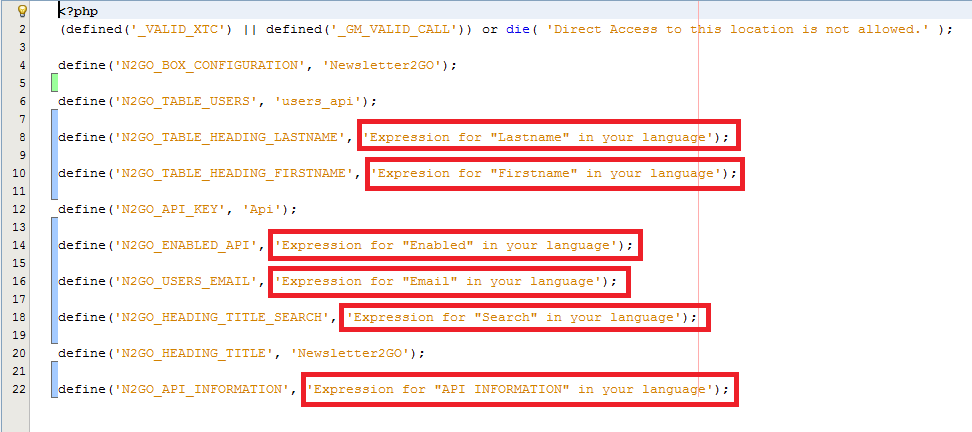
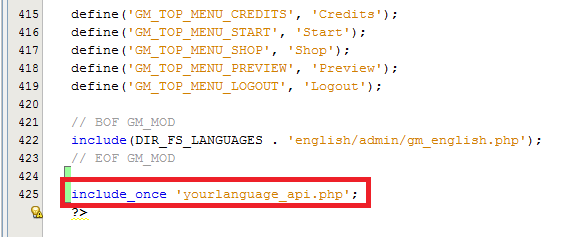
Step 7. NOTE: Plugin is available in English, German, French and Portuguese. If your shop has some other language available please do this step so plugin could work in that language.
-
First you need to create a new file called yourlanguage_api.php. The file content is shown below. You should only change the selected translations.
- Open the file lang/yourlanguage/admin/ yourlanguage.php
- Copy the marked codes below, and paste them at the corresponding position in your file. In this case it is at the end of your file.
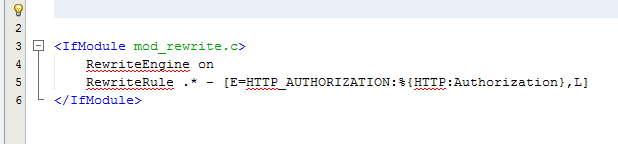
Step 8. NOTE: If your PHP is running as CGI/SuExec, please do this step, if not please skip this step.
- Open the file .htaccess in your Gambio project folder.
- Copy the marked codes below, and paste them at the corresponding position in your file.
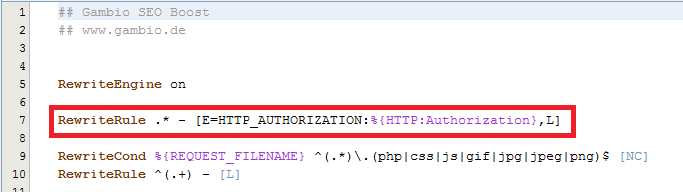
- If you do not have .htaccess file, please create one and put the codes below in that file.
1.2 enabling plug-in
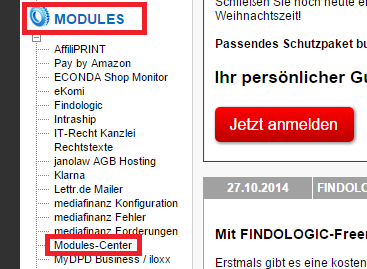
After these 8 steps go to your Gambio admin page. Under section MODULES go to XT-Moduls for older versions of Gambio, and for Gambio GX2 or newer go to Modules-Center.
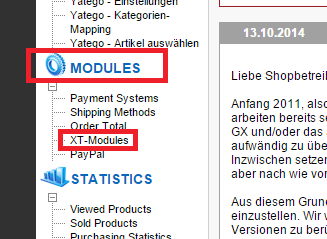
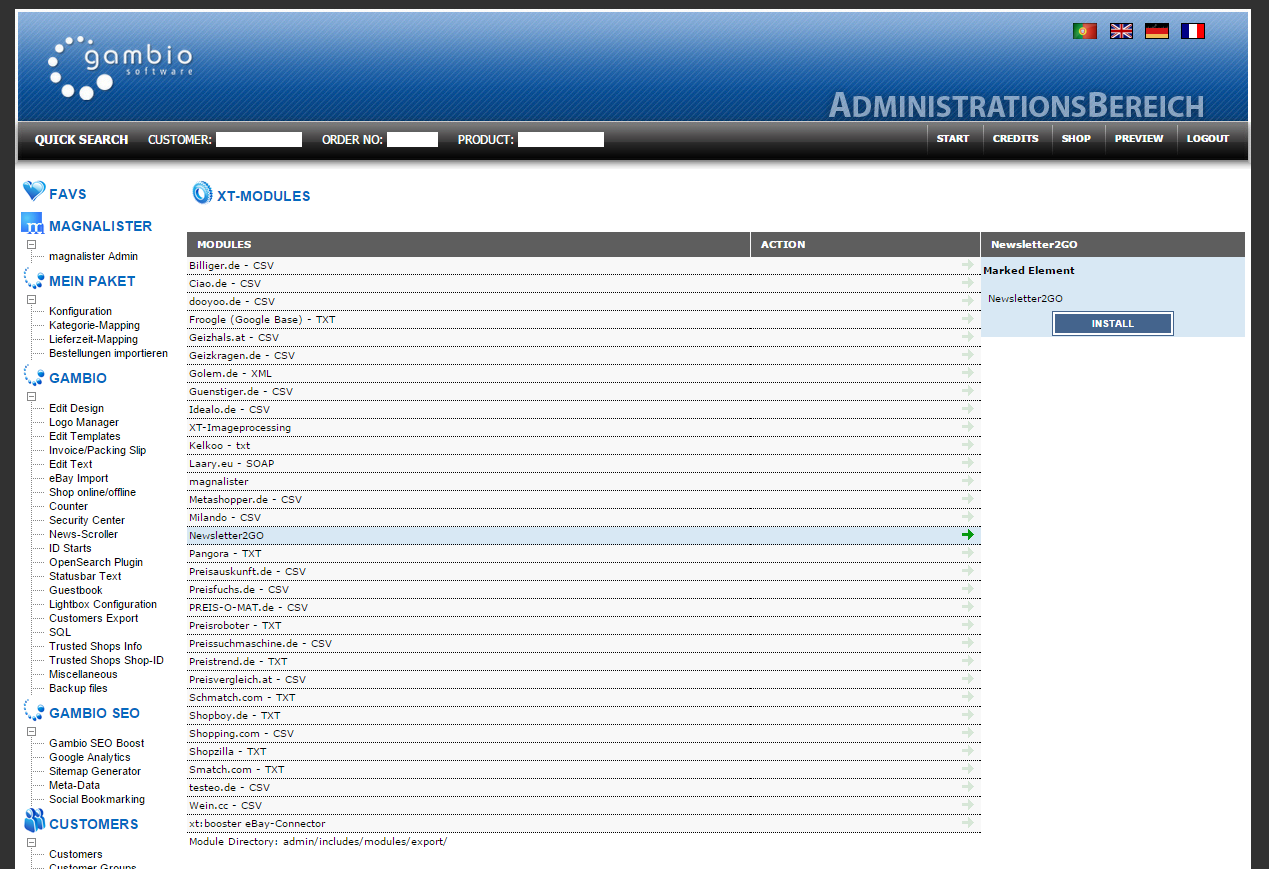
You will be listed with plugins available for your shop. Choose Newsletter2GO, and click Install.
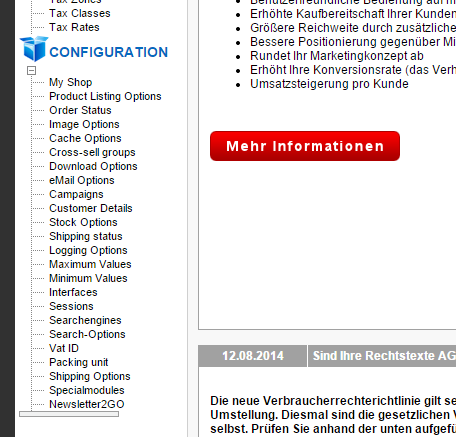
Now your plugin is available. It is under CONFIGURATION section.
2. Enabling API access
To use API connector for specific user, user must have rights for API access. To allow user to connect through API, go to Newsletter2GO page and enable API access by selecting user for whom you want to enable api. On the right side you will get Enabled check box and api key field. By selecting check box system will generate API key, if user do not already have api key, which is required for access:
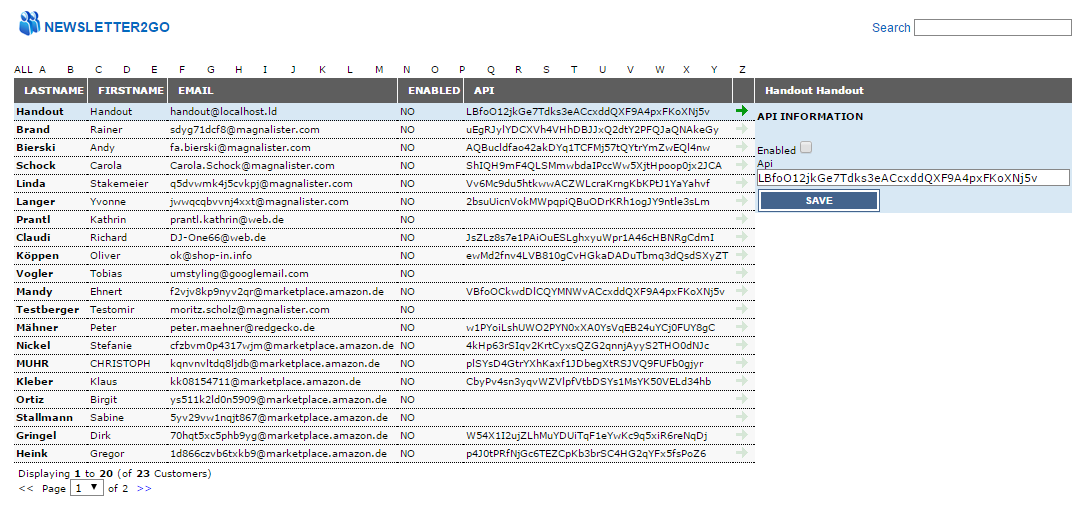
Copy API key and click on Save button. User is now allowed to access through API calls.
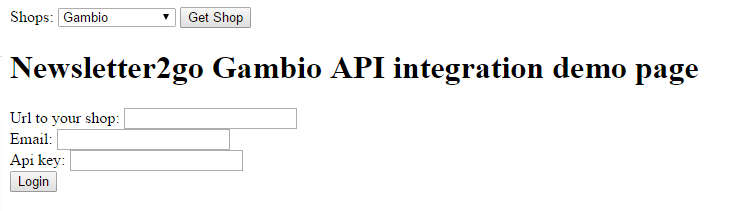
3. Running the demo
Open demo.php in web browser and enter your Gambio data:
The rest of the demo page is straightforward (it’s the same as for other plugins demo).

Newsletter2go verwendet Cookies, um Ihnen den bestmöglichen Service zu gewährleisten. Wenn Sie auf der Seite weitersurfen stimmen Sie der Cookie-Nutzung zu. Ich stimme zu.
